


n8n is an automation tool, but you don’t need to sit through a two-hour video to start using it. In this piece I want to show you plainly what n8n actually is, how to install it in a few minutes, and how to build your first real workflow that automates a manual, repetitive task. There’s one more important point too: not every process should be handed to automation, and I’ll tell you exactly which ones are worth automating.
What Exactly Is n8n?
n8n is a process automation tool that lets you connect different services and apps without writing a single line of code, building a chain of work that runs itself. Working with it is like drawing a map: you place each task on the screen as a box, called a node, and connect the boxes with a line. One box says “whenever the site form is submitted,” and the next says “send a message on Telegram.” That complete chain is called a workflow, and this simple structure is what takes daily repetitive work off your shoulders.
Two things make n8n a more serious option than the alternatives. First, it connects to more than 1,500 services like Telegram, Google Sheets, email, and all kinds of sales software. Second, its core is free and you can install it on your own server, so you’re not stuck with a monthly subscription and your data doesn’t sit with a third-party service.
Before You Install, Answer This One Question
If you make a messy kitchen ten times faster, all you’ve done is make it ten times messier, ten times faster. Automation is exactly the same: it repeats whatever process you give it faster and with fewer slips, but it never tidies up a messy process. If you have a manual process that’s chaotic and disorganized and you simply automate it, all you’ve achieved is repeating that same chaos at higher speed. So the real first step isn’t installing n8n, it’s defining precisely the process you want to hand over.
In the anatomy view of a business, automation and a tool like n8n belong to the hands, meaning execution, the place where decisions have to actually get carried out. This tool only works when your process is already defined and the only problem is that running it is slow, manual, and tedious.
So before installing, take a sheet of paper and write that repetitive task out step by step: where it starts, what happens at each stage, and what should happen at the end. Once you have that simple map, installing and building the workflow becomes straightforward.
How Do You Install n8n?
There are three ways to start, and choosing between them comes down to whether you just want to try it once or you’re going to rely on it permanently.
- The cloud version, for a quick try. n8n has a cloud version that needs no installation at all: you sign up on their site and a ready environment opens immediately so you can build your first workflow. It’s great for learning quickly, but after the trial it becomes paid.
- A free install on your own computer, for practice. If you want to learn n8n on your own machine, install the JavaScript runtime (Node.js) and you can bring n8n up locally with one simple command and open it in your browser. This is free and plenty for practice.
- Installing on a server, for permanent use. When you want your workflows running around the clock, the best route is installing the free version on a virtual server using Docker. You set it up once and it stays on, independent of your own computer.
The third route usually makes the most sense, because the self-hosted version is free with no monthly cloud cost, and it sidesteps paying a foreign service in dollars. My suggestion is to start with the second or first route to learn, and once your first real workflow is ready, move to a server install to make it permanent.
Build Your First Workflow, Step by Step
Every workflow in n8n is built from two kinds of box, or node, and understanding them makes the whole thing simple. The first is the starting node, or trigger, the event that sets the chain off, like a form being submitted or a certain time arriving. The second is the action node, the work that has to happen after that event, like sending a message or adding a row to a sheet. You line these boxes up and connect them with a line, and that’s a complete workflow.
Let’s build a simple, useful workflow together. n8n itself will build you a contact form and give you a link you can put in your bio or on your site, and every time someone fills it in, their answer arrives automatically in your Telegram, so you no longer have to keep checking email or your site’s panel. Here are the steps:
Step 1: Create an empty workflow
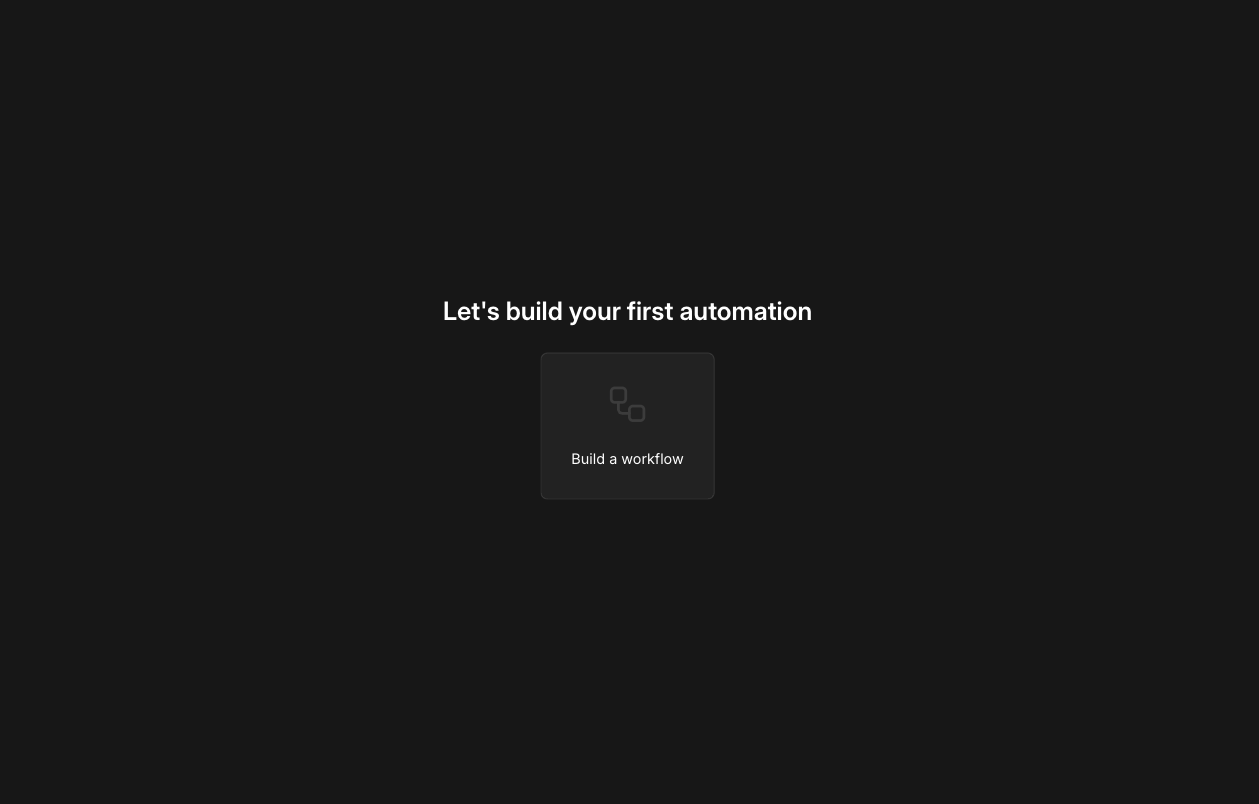
After opening n8n, this is the first thing you see. Click the Build a workflow button.
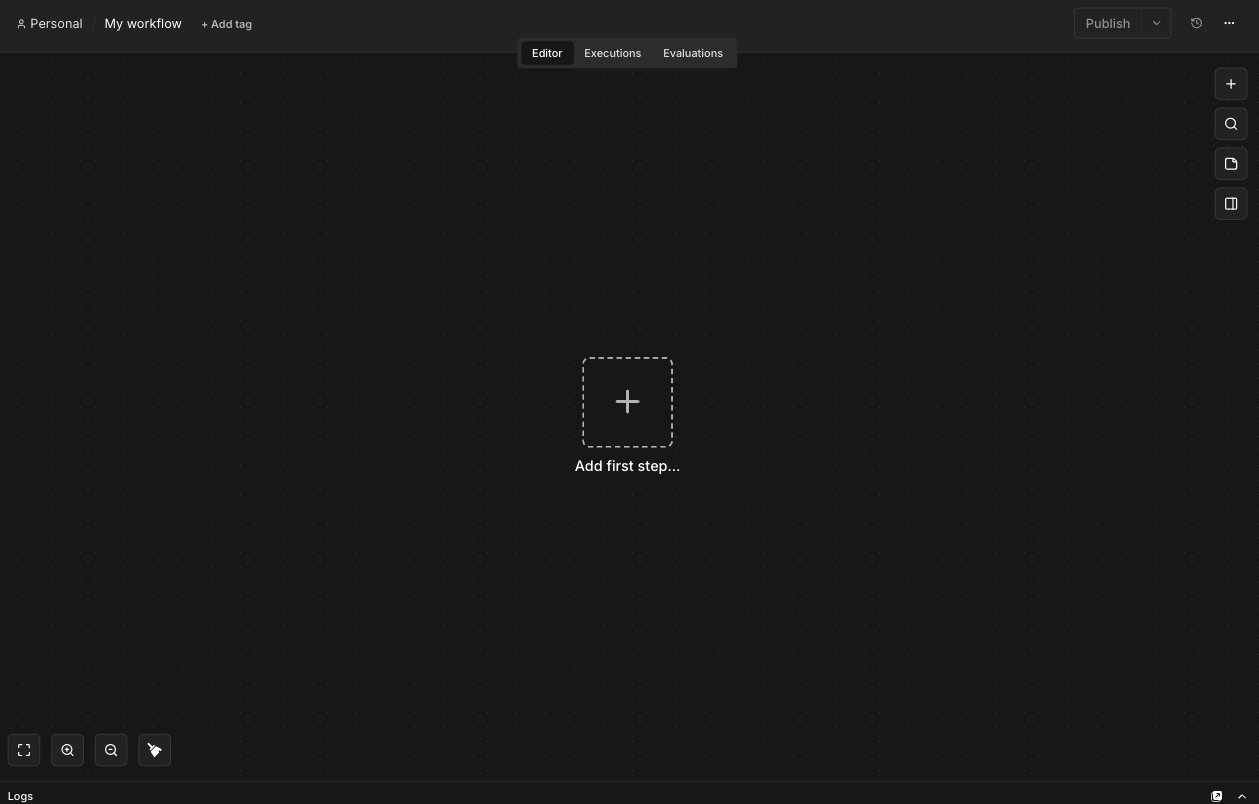
An empty canvas opens with a dashed square and a + in the middle labelled Add first step…. That’s where your first box goes. The Publish button sits in the top right the whole time, and you’ll need it at the end.
Step 2: Add the trigger node
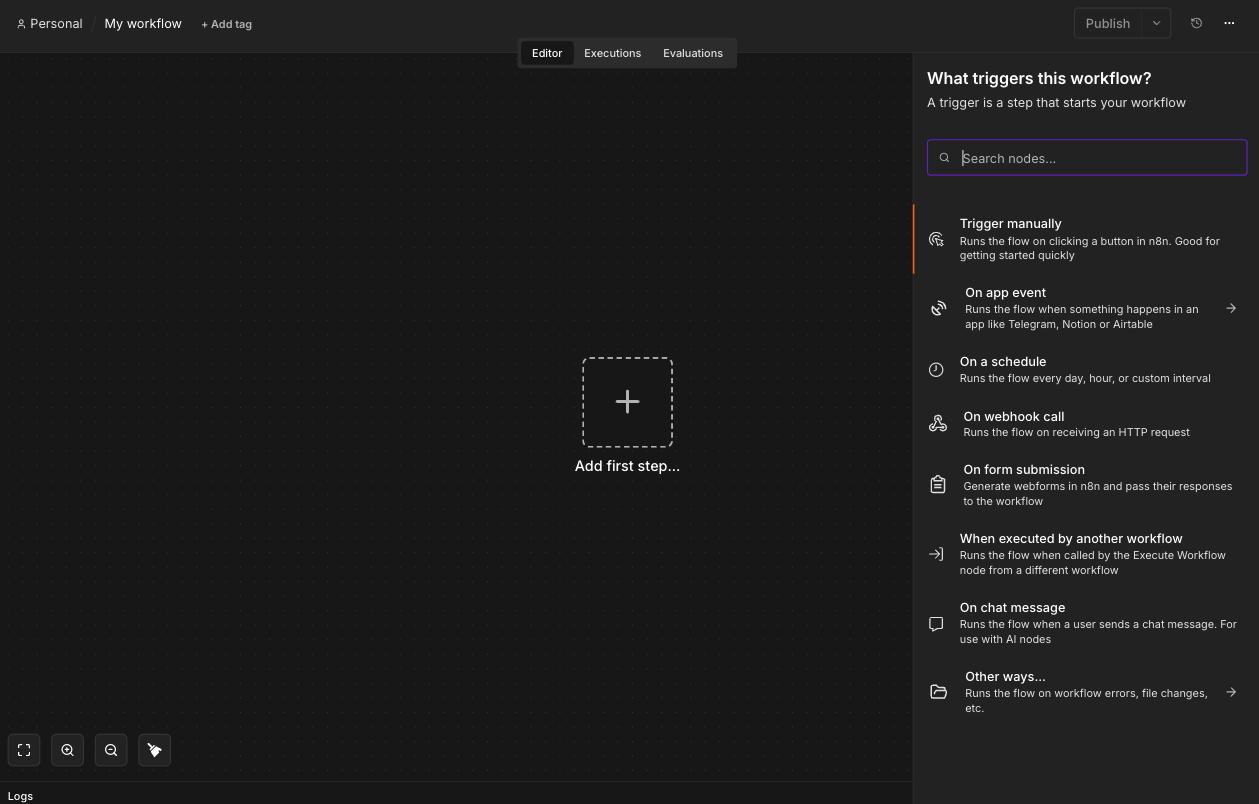
Click that Add first step… box or press the N key to open the right-hand panel titled What triggers this workflow?. n8n is asking what event should set the chain off. For our example, choose On form submission.
Step 3: Build your form
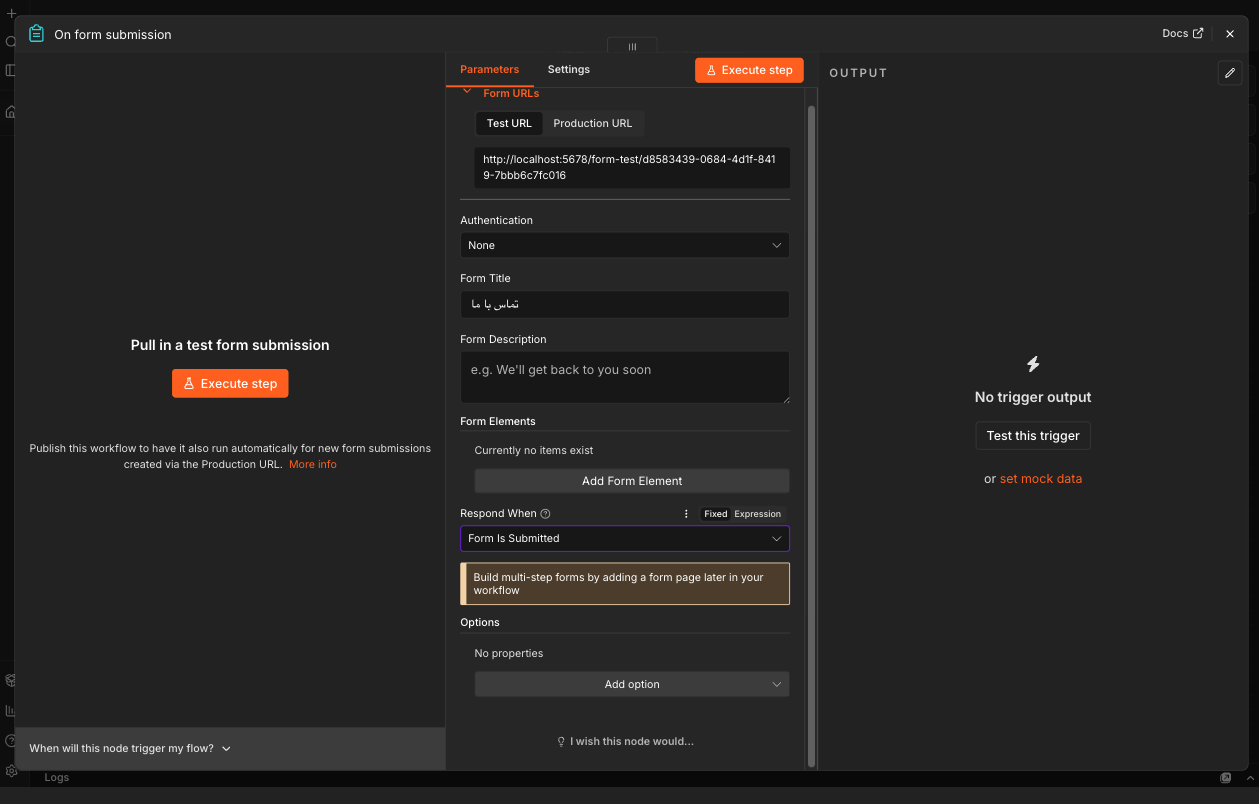
Choosing that option opens the node’s settings. In Form Title write the form’s name, and with the Add Form Element button add the fields you want, one by one, like name and phone number. At the top of this same screen you’ll see two addresses: Test URL for trying it out, and Production URL, which is the final link to the form that you’ll later put on your site or in your bio.
Step 4: Connect the Telegram node
Go back to the canvas and click the + next to the first box to open the What happens next? panel, meaning what should happen after the trigger. It matters that you use the + attached to the box, because that’s what connects the second box to the first automatically.
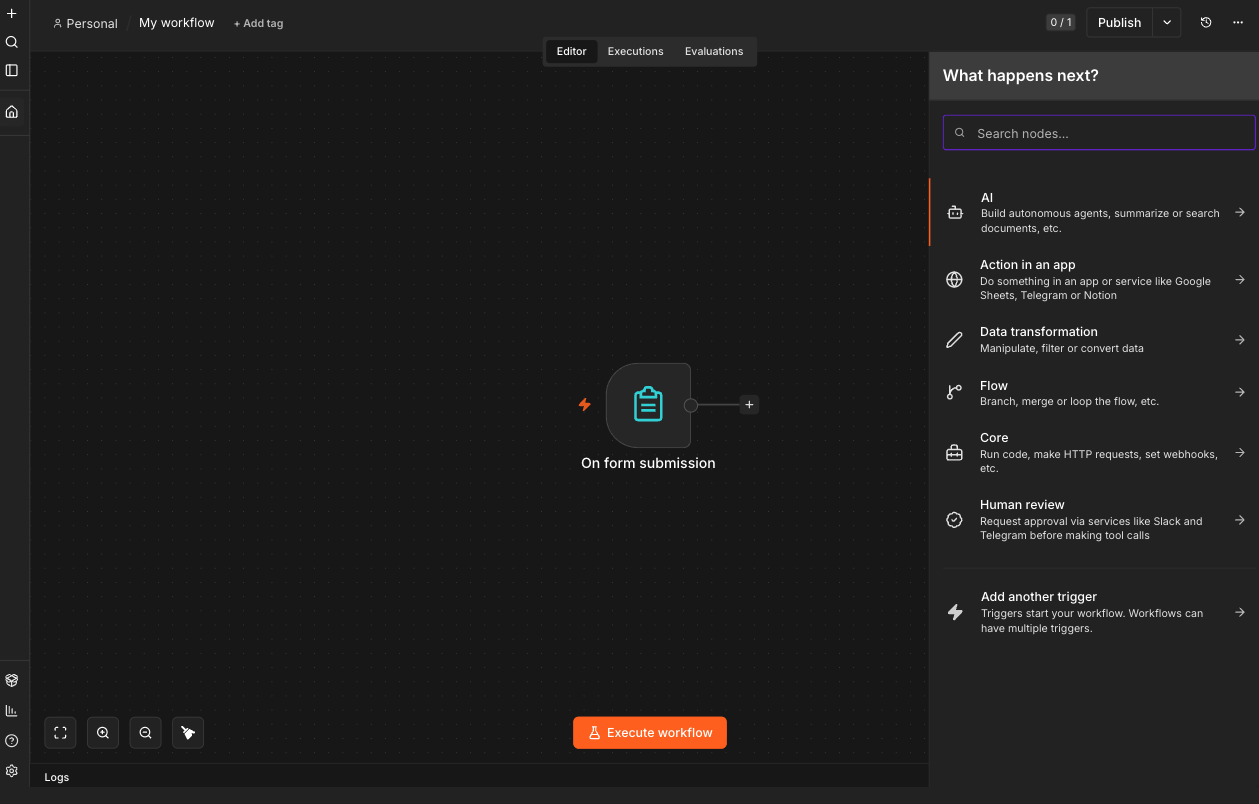
In the Search nodes… box, type Telegram.
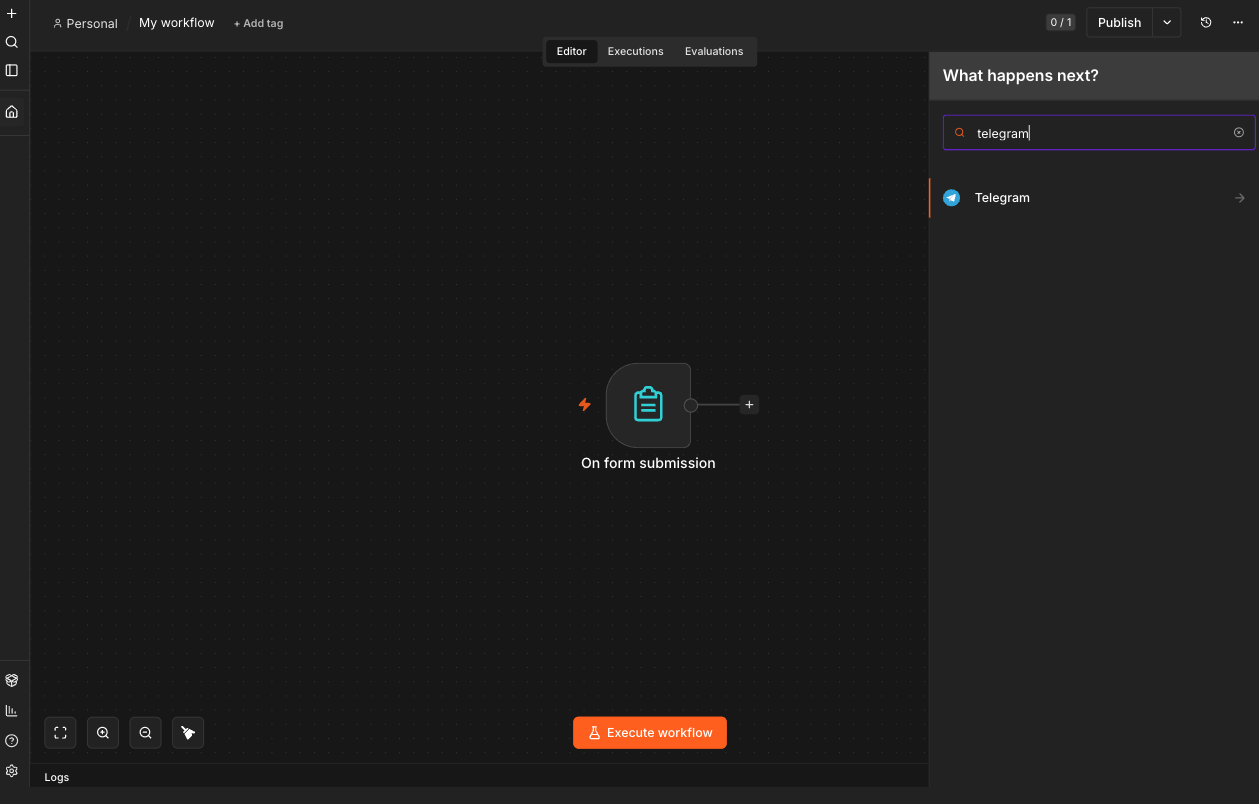
Selecting Telegram opens the list of things it can do, 27 different actions ranging from sending messages and files to managing groups.
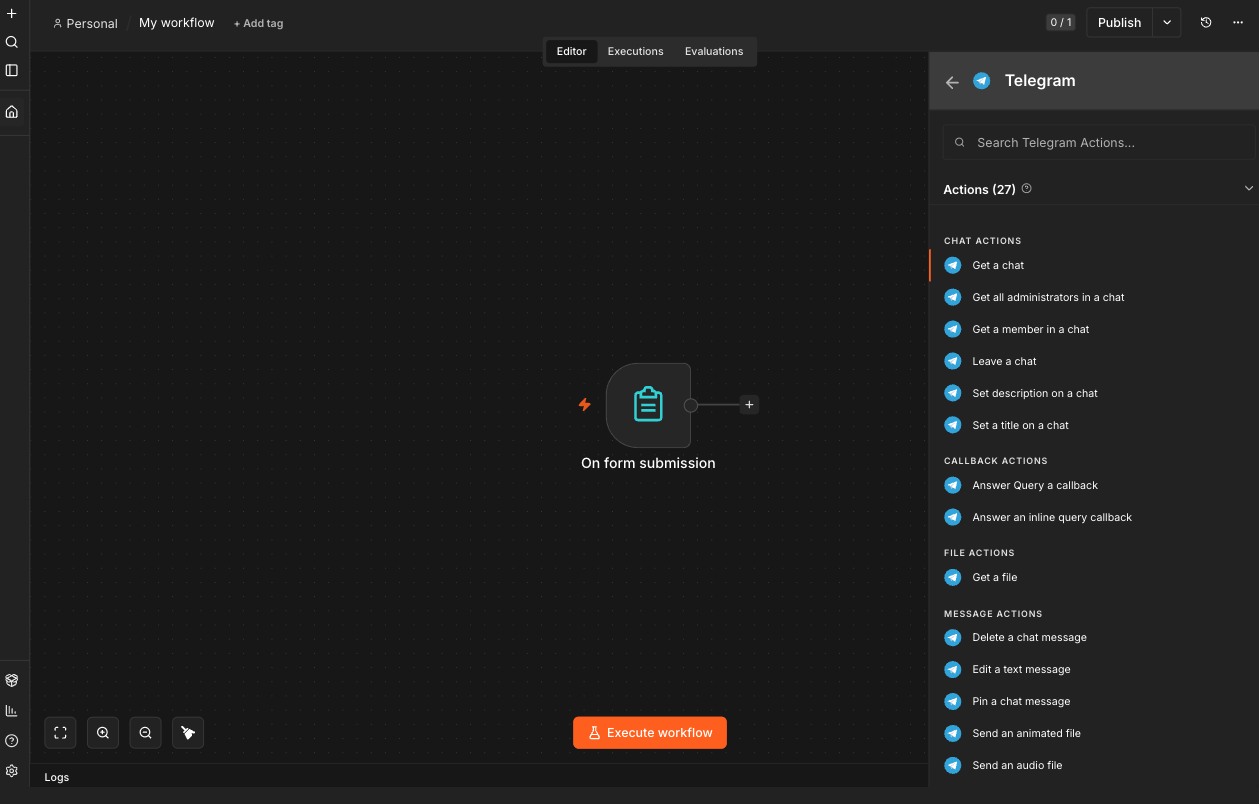
From those, choose Send a text message, and if you don’t feel like scrolling the list, just type the action’s name into the search box.
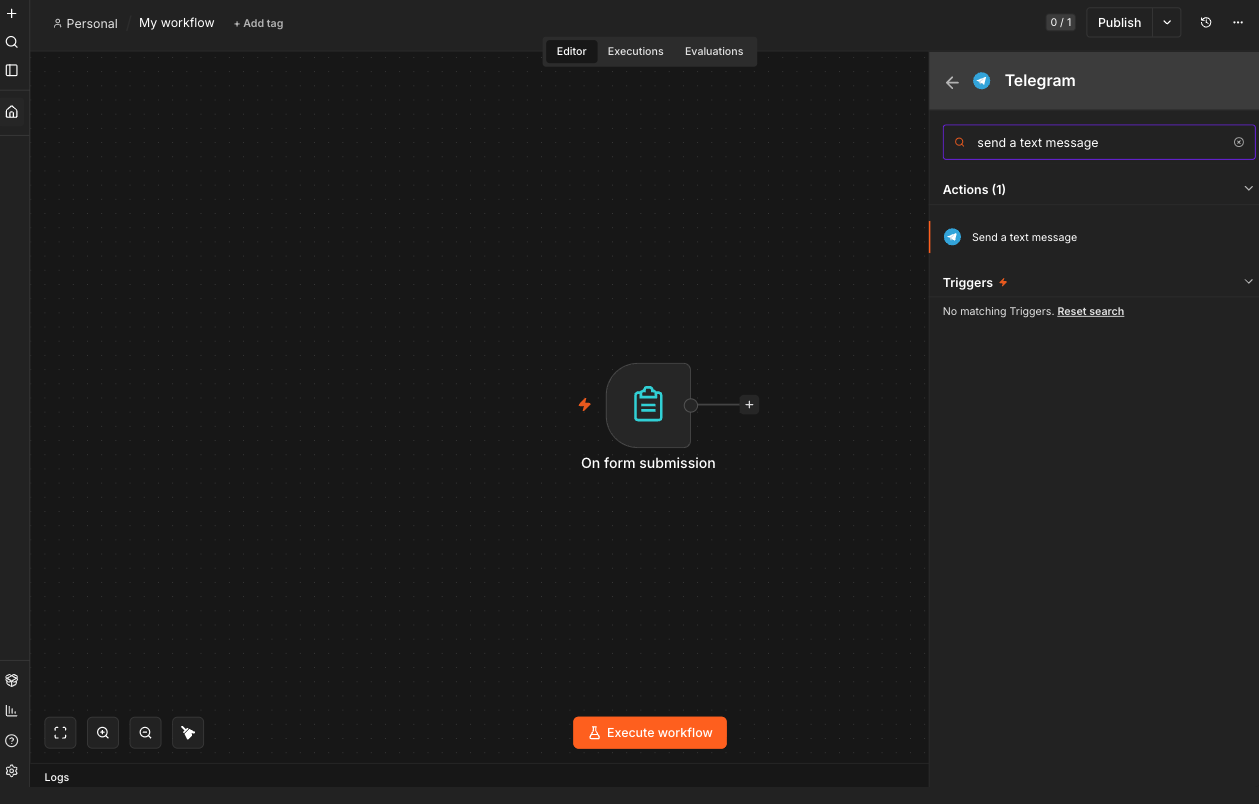
Step 5: Connect your Telegram bot
At the top of this node’s settings you’ll see a Credential section reading “No credentials yet”. Click Set up credential and put your Telegram bot token there. You only do this once. After that, in the Chat ID field you enter the chat the message should go to, and in Text you write the message. Until that connection is made, you’ll see a small red triangle on the Telegram box, meaning the node is still incomplete.
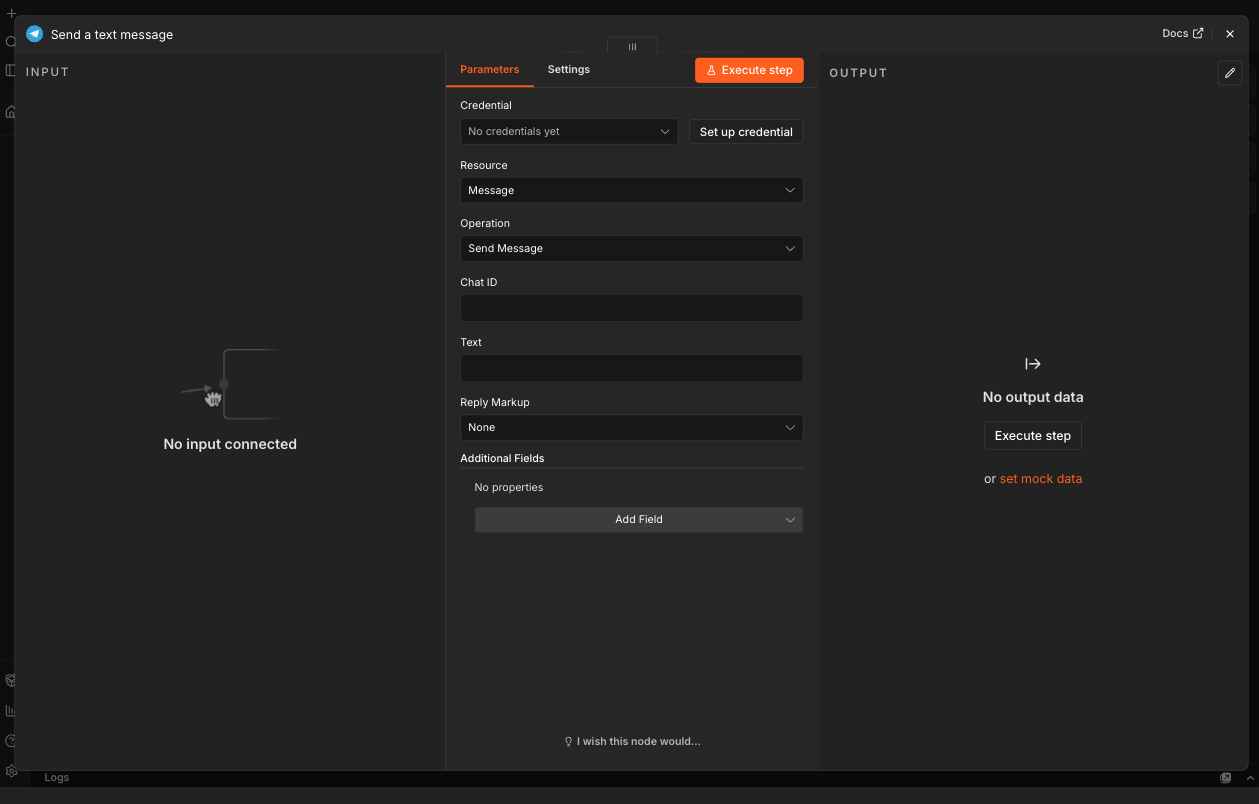
Step 6: Test it and publish it
First use the Execute step button to check the message actually reaches your Telegram. Then click Publish in the top right, because until you publish, the workflow only runs in test mode and won’t fire automatically.
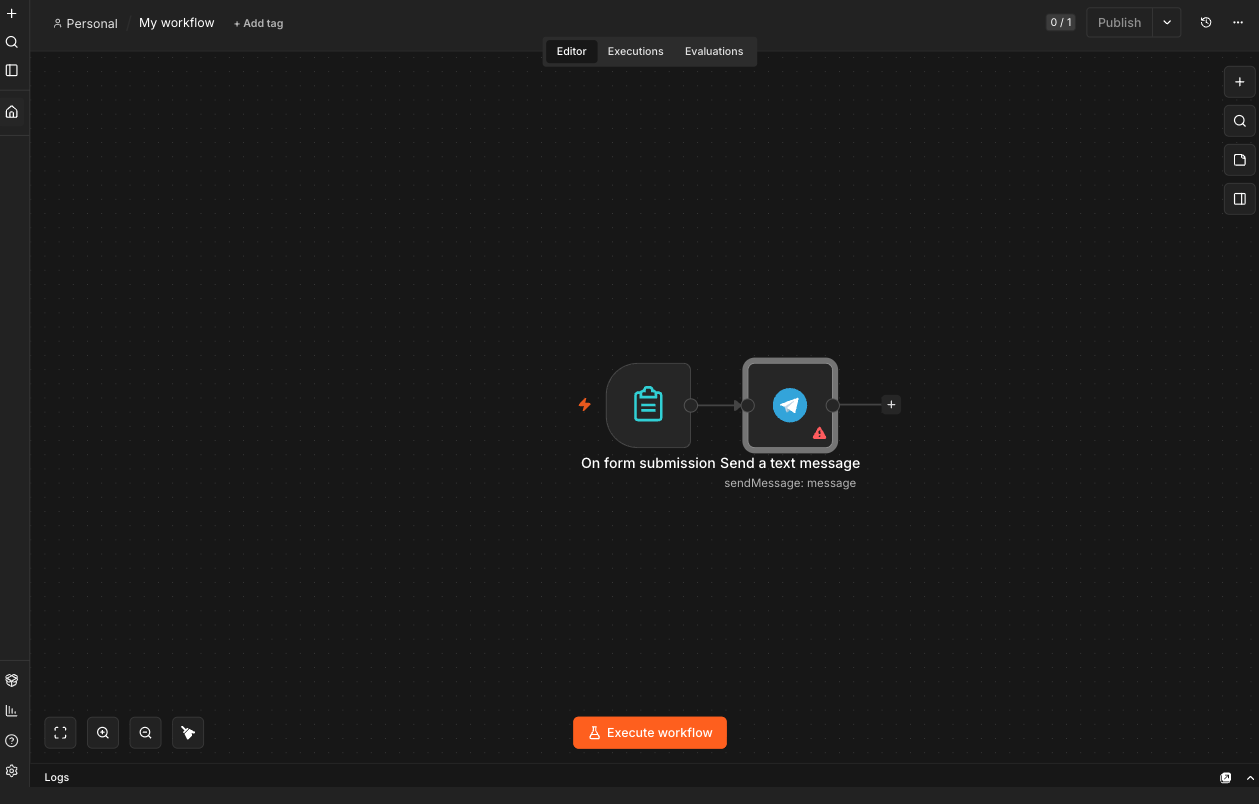
These six simple steps take a daily repetitive task off your shoulders entirely, and the nice part is that you can reuse the logic of this same workflow in hundreds of other places just by swapping the boxes, putting a Google Sheets row or a welcome email where Telegram is.
How Much Time Does This Actually Free Up?
Imagine you run a small online shop and every night you have to sit down, copy the day’s orders one by one from your site’s panel into a spreadsheet, and then send each customer a thank-you message with a tracking code. That takes close to an hour every night and is full of human error. Now imagine sitting down once and writing that process out precisely on paper: the trigger is a new order being placed, the first action is adding the order details to a sheet, and the second is sending a prepared message to the customer. Then you build that same map in n8n with a few boxes and switch it on.
From the next day that hour is free every night and the copying mistakes drop to zero. But note that what made this possible wasn’t n8n itself, it was the ten minutes you spent getting the process clear. If you’d gone straight to the tool without thinking, you’d have discovered halfway through building the workflow that you weren’t sure what the steps were either, and the tool would have added to your confusion instead of helping.
All of it comes down to one sentence: n8n is a free, powerful tool that with a few minutes of setup and one first workflow can automate the repetitive work in your business, but the real power comes not from the tool but from the clear, tidy process you hand it. So next time you want to automate something, get the process clear on paper first and then hand it to n8n, because good automation means automating good work, not speeding up a mess.
If you want to be sure you’re picking the right process to automate and not spending your energy in the wrong place, in a free diagnosis session we’ll look together at which part of your work would gain most from automation and where to start.